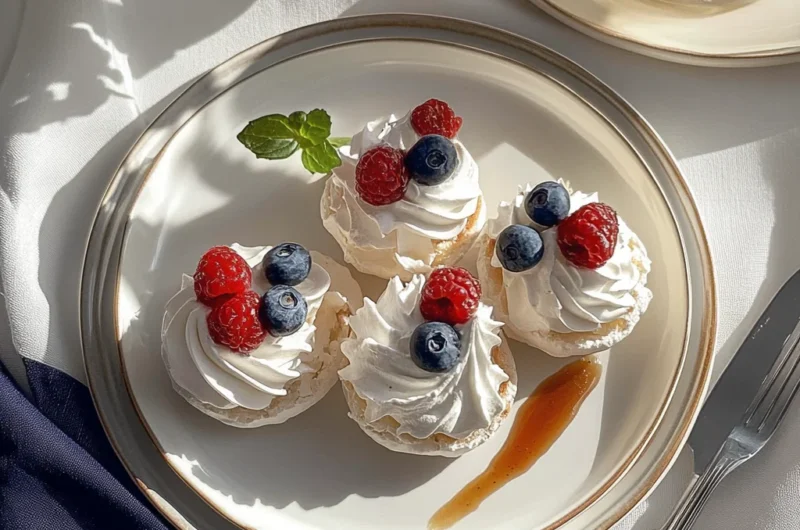
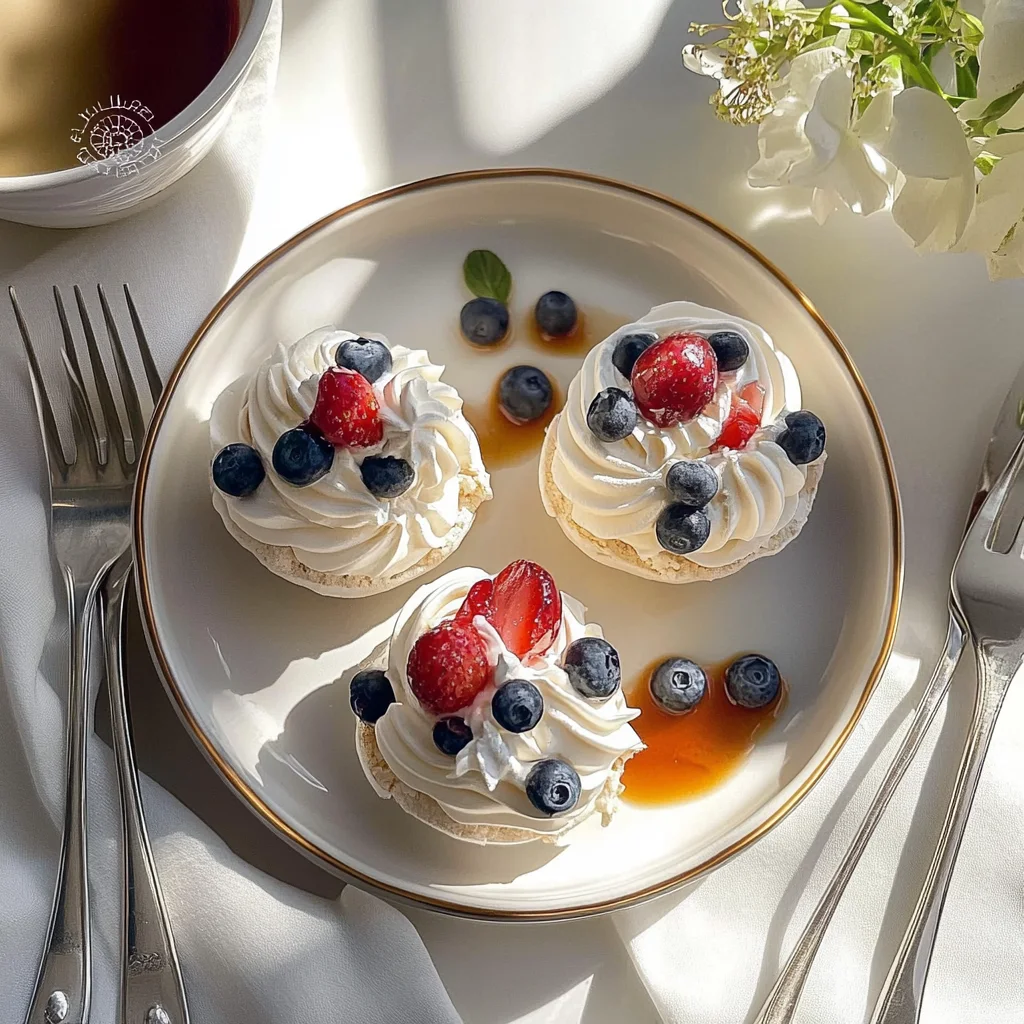
Imagine sinking your teeth into a crisp, airy Mini Pavlova, where the outer shell shatters gently to reveal a cloud-like interior that melts in your mouth. Each bite is a symphony of textures and flavors, with luscious whipped cream and vibrant, juicy fruits dancing atop the delicate meringue—making this dessert a showstopper for any occasion.
As I reminisce about family gatherings filled with laughter and joy, these Mini Pavlovas always steal the spotlight on dessert tables, bringing smiles to faces young and old. Whether it’s a sunny picnic or a cozy dinner party, this light dessert promises to elevate your taste experience, leaving you and your guests craving more.
Why Does Everyone Love Mini Pavlovas?
Light and airy, these delicate meringue nests are a dream for any dessert lover. Quick to make, with just 20 minutes of prep, they offer an impressive yet simple treat. Versatile toppings allow endless combinations—mix berries, cream, or even citrus for a refreshing twist. Crowd-pleasers at any gathering, they’re perfect for sharing!
Mini Pavlovas Ingredients
- For the Meringue Base
- 4 large egg whites (at room temperature) – Ensure the egg whites are at room temperature for better volume when whipped.
- 1 cup granulated sugar (superfine sugar is preferred) – Using superfine sugar helps to create a smoother meringue texture.
- 1 teaspoon white vinegar (or lemon juice) – This acid stabilizes the egg whites, resulting in a firmer meringue.
- 1 teaspoon cornstarch (for stability) – Cornstarch adds structure and helps prevent the meringue from weeping.
- For the Toppings
- 1 cup heavy cream (for whipping) – Heavy cream whips up beautifully, creating a rich and luscious topping for your Mini Pavlovas.
- 2 tablespoons powdered sugar (for sweetening cream) – Powdered sugar dissolves easily, ensuring your whipped cream is perfectly sweetened without graininess.
- 1 cup mixed berries (such as strawberries, blueberries, and raspberries) – Fresh berries add vibrant color and a burst of flavor to your delightful Mini Pavlovas.
How to Make Mini Pavlovas
1. Preheat the oven to 225°F (110°C) and line a baking sheet with parchment paper. This low temperature ensures that your meringues dry out slowly, resulting in that perfect crisp exterior.
2. Beat the egg whites in a mixing bowl with an electric mixer until soft peaks form. You want them to be fluffy and light, signaling that you’re on the right track.
3. Gradually add the granulated sugar, one tablespoon at a time, continuing to beat until the mixture is glossy and stiff peaks form. The more you beat, the better the texture; it should be shiny and hold its shape beautifully.
4. Fold in the white vinegar and cornstarch gently until just combined. This step adds stability to your meringues, ensuring they maintain their lovely shape while baking.
5. Spoon or pipe the meringue mixture onto the prepared baking sheet, forming small nests. Aim for a circular shape with a slight indentation in the center to hold those delightful toppings later.
6. Bake for 60 minutes, then turn off the oven and let the meringues cool completely inside. This gradual cooling helps prevent cracks and keeps them light as air.
Assemble Pavlovas:
7. Whip the heavy cream in a separate bowl with powdered sugar until soft peaks form. You want it sweetened perfectly to complement your mini pavlovas without overpowering their delicate flavor.
8. Remove the cooled meringues carefully from the parchment paper. Take your time; you want them intact for that gorgeous presentation!
9. Top each nest with whipped cream and a generous amount of mixed berries like strawberries, blueberries, and raspberries. The vibrant colors will make your mini pavlovas irresistible!
10. Serve immediately and enjoy your mini pavlovas! They are best enjoyed fresh when everything is light and fluffy.
Optional: Garnish with mint leaves for an extra pop of color!
Exact quantities are listed in the recipe card below.
Tips for the Best Mini Pavlovas
- Egg Whites Matter: Ensure your egg whites are at room temperature for better volume and stability when whipped.
- Sugar Graduality: Add granulated sugar slowly, one tablespoon at a time, to achieve that glossy, stiff peak texture essential for perfect Mini Pavlovas.
- Vinegar’s Role: Don’t skip the vinegar! It helps stabilize the meringue, preventing it from collapsing after baking.
- Gentle Folding: When adding cornstarch and vinegar, fold gently to keep the air bubbles intact; this ensures light, airy nests.
- Cooling Time: Let the meringues cool completely in the oven after baking. This prevents cracks from sudden temperature changes and keeps them crisp.
- Whipping Cream: Whip your cream just until soft peaks form; overwhipping can lead to a grainy texture that overpowers the delicate Mini Pavlovas.
How to Store and Freeze Mini Pavlovas
- Room Temperature: Keep baked meringue nests in an airtight container for up to 2 days to maintain their crisp texture.
- Fridge: Store any leftover whipped cream and mixed berries in the fridge for up to 3 days, but avoid topping the Mini Pavlovas until serving.
- Freezer: You can freeze unfilled meringue nests for up to a month; wrap them gently in plastic wrap and place them in a freezer-safe container.
- Assembling: Assemble Mini Pavlovas just before serving to ensure the meringue stays light and crispy, avoiding sogginess from the toppings.
Mini Pavlovas Your Way
Feel free to get creative and make these delightful treats your own with fun variations!
- Dairy-Free: Substitute the heavy cream with coconut cream for a tropical twist. The richness of coconut adds an inviting flavor, making each bite feel indulgent yet light.
- Chocolate Drizzle: Melt dark chocolate and drizzle it over the whipped cream topping. This adds a luxurious touch and a rich contrast to the sweetness of the meringue.
- Citrus Zest: Incorporate lemon or orange zest into the whipped cream for a bright, zesty kick. This simple addition elevates the dessert with refreshing notes that perfectly complement the berries.
- Nutty Crunch: Sprinkle chopped nuts like pistachios or almonds on top for added texture. The crunch provides a delightful contrast to the soft meringue and creamy layers.
- Exotic Fruits: Swap mixed berries for tropical fruits such as kiwi, mango, or passion fruit. Each fruit brings its unique sweetness and vibrant color, transforming your pavlovas into a stunning centerpiece.
- Spiced Whipped Cream: Add a pinch of cinnamon or cardamom to the whipped cream for warmth and depth. This subtle spice can transform your dessert into something truly unique and comforting.
- Savory Twist: Consider adding herbs like basil or mint between the layers of cream and fruit. The unexpected herbal notes will surprise your taste buds in a delightful way!
Make Ahead Options
If you’re planning a gathering or simply want to enjoy a delightful dessert without the last-minute rush, these Mini Pavlovas are perfect for meal prep. You can prepare the meringue base ahead of time by following the initial steps: preheat your oven to 225°F (110°C), beat the egg whites until soft peaks form, and gradually add 1 cup of granulated sugar until glossy. After folding in 1 teaspoon of white vinegar and 1 teaspoon of cornstarch, shape the nests and bake them for 60 minutes. Allow the meringues to cool completely in the oven. For toppings, whip 1 cup of heavy cream with 2 tablespoons of powdered sugar and prep your mixed berries—strawberries, blueberries, and raspberries—up to 24 hours in advance. When you’re ready to serve, simply top each meringue nest with whipped cream and berries for a stunning presentation that tastes as fresh as if made that day! By prepping components like these Mini Pavlovas ahead, you save valuable time while ensuring an impressive dessert ready to wow your guests.
Mini Pavlovas Recipe FAQs
What type of sugar should I use for the meringue base?
Using superfine sugar is preferred for making meringue because it dissolves more easily, resulting in a smoother texture. However, if you don’t have superfine sugar on hand, regular granulated sugar will work too. Just make sure to add it gradually to ensure it fully incorporates into the egg whites.
Why do I need vinegar or lemon juice in the meringue?
Adding vinegar or lemon juice helps stabilize the egg whites, allowing your meringue to hold its shape and achieve that beautiful glossy finish. It also gives a subtle tang that balances the sweetness of the dessert.
How should I store leftover mini pavlovas?
If you have any leftovers (which is rare!), store the meringue nests in an airtight container at room temperature for up to 2 days. Avoid refrigerating them, as moisture can cause them to become chewy instead of crisp.
Can I freeze mini pavlovas for later use?
Yes! You can freeze the cooled meringue nests by placing them in an airtight container, separated by parchment paper to prevent sticking. They can be frozen for up to 1 month. When you’re ready to enjoy them, simply thaw at room temperature and top with fresh whipped cream and berries just before serving.
What should I do if my meringue doesn’t form stiff peaks?
If your meringue isn’t forming stiff peaks, it could be due to grease in your mixing bowl or on your beaters. Ensure everything is clean and dry before starting. Additionally, double-check that you’re using room temperature egg whites; this helps them whip up properly.
How many servings does this mini pavlova recipe yield?
This delightful recipe yields 4 servings, making it perfect for an intimate gathering or a sweet treat after dinner. Each serving contains about 180 calories, so you can indulge without too much guilt!