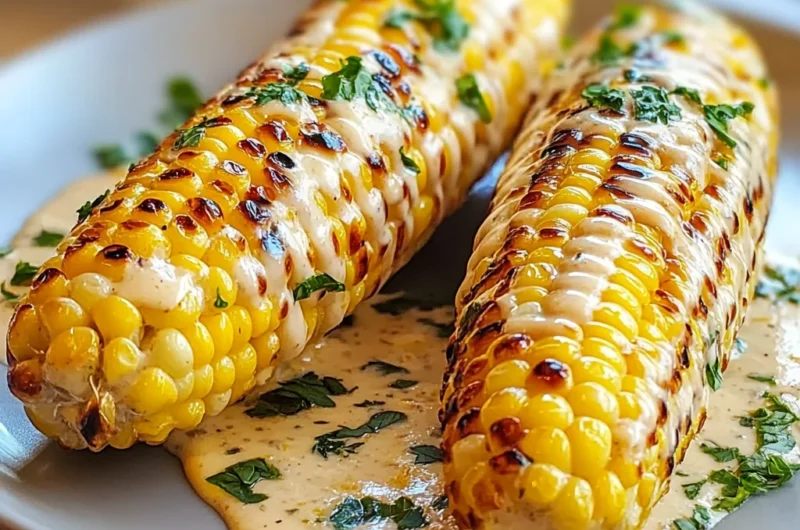
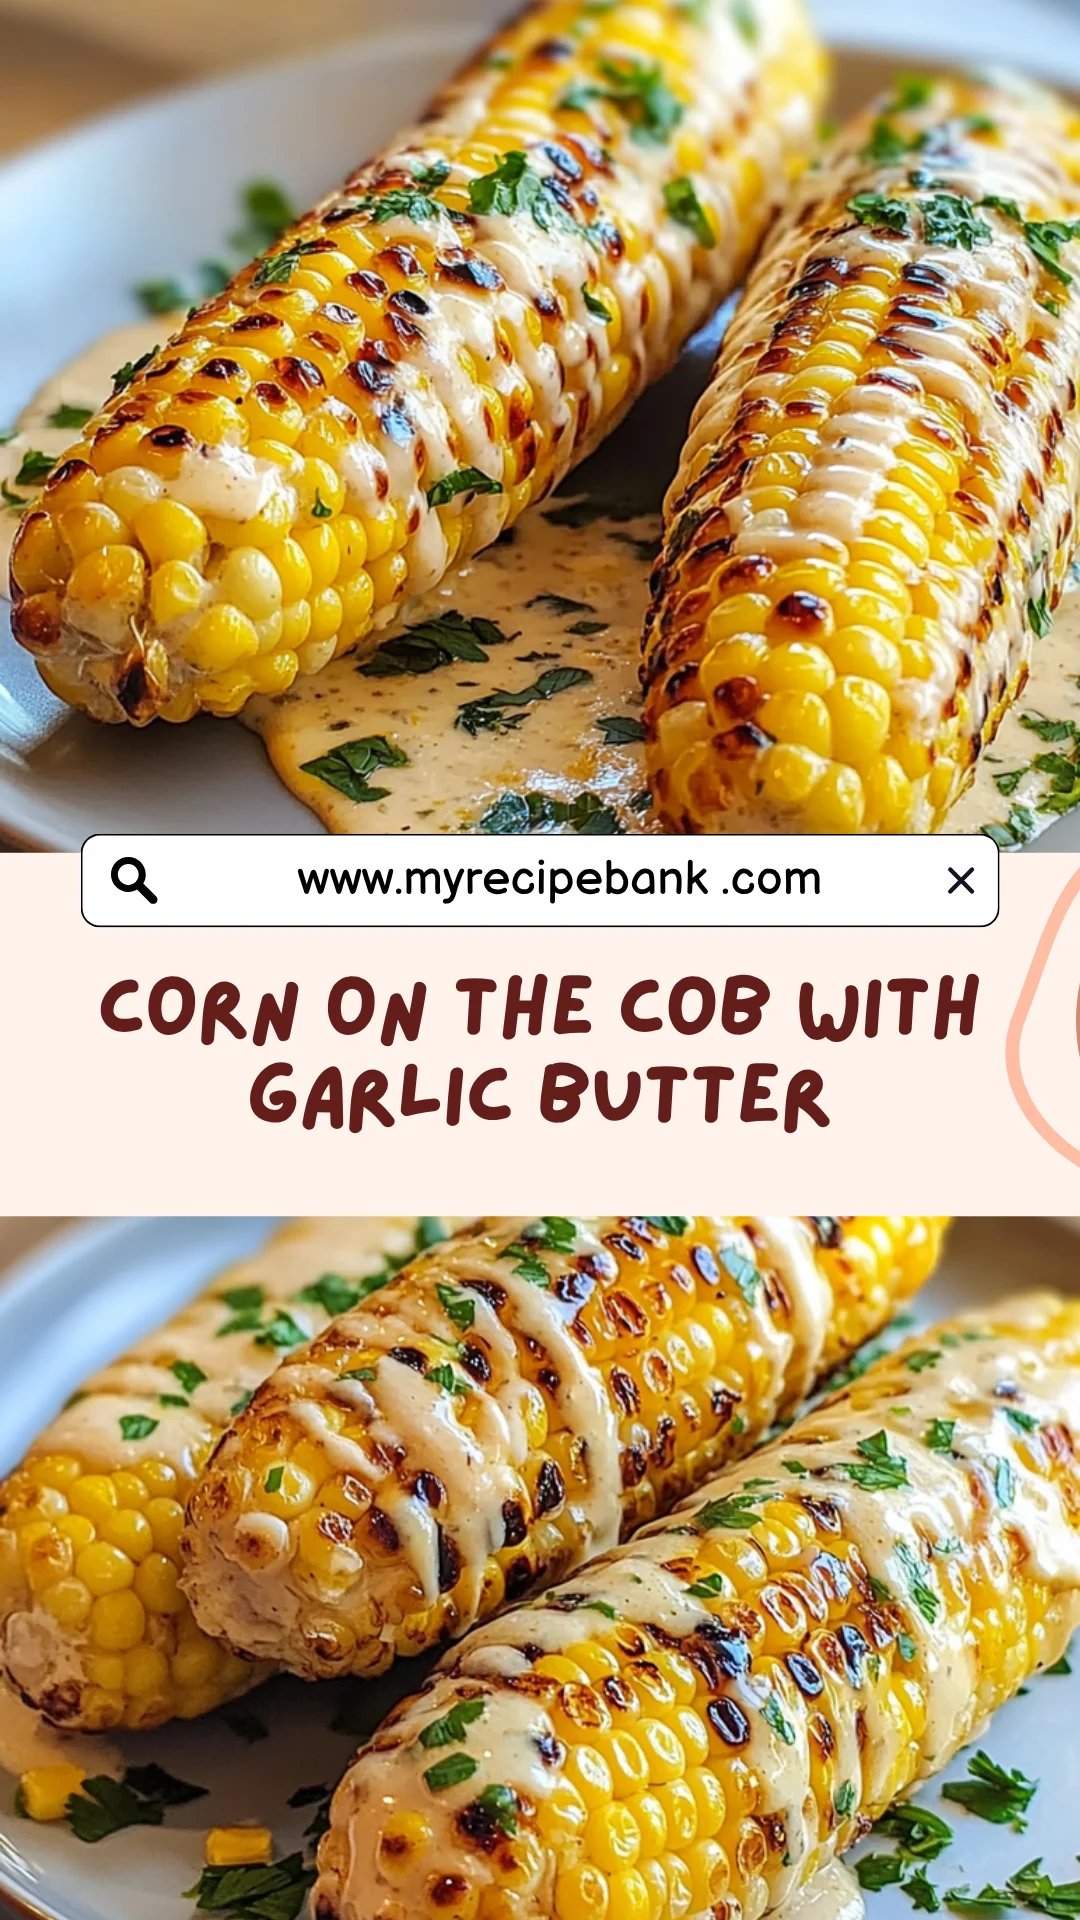
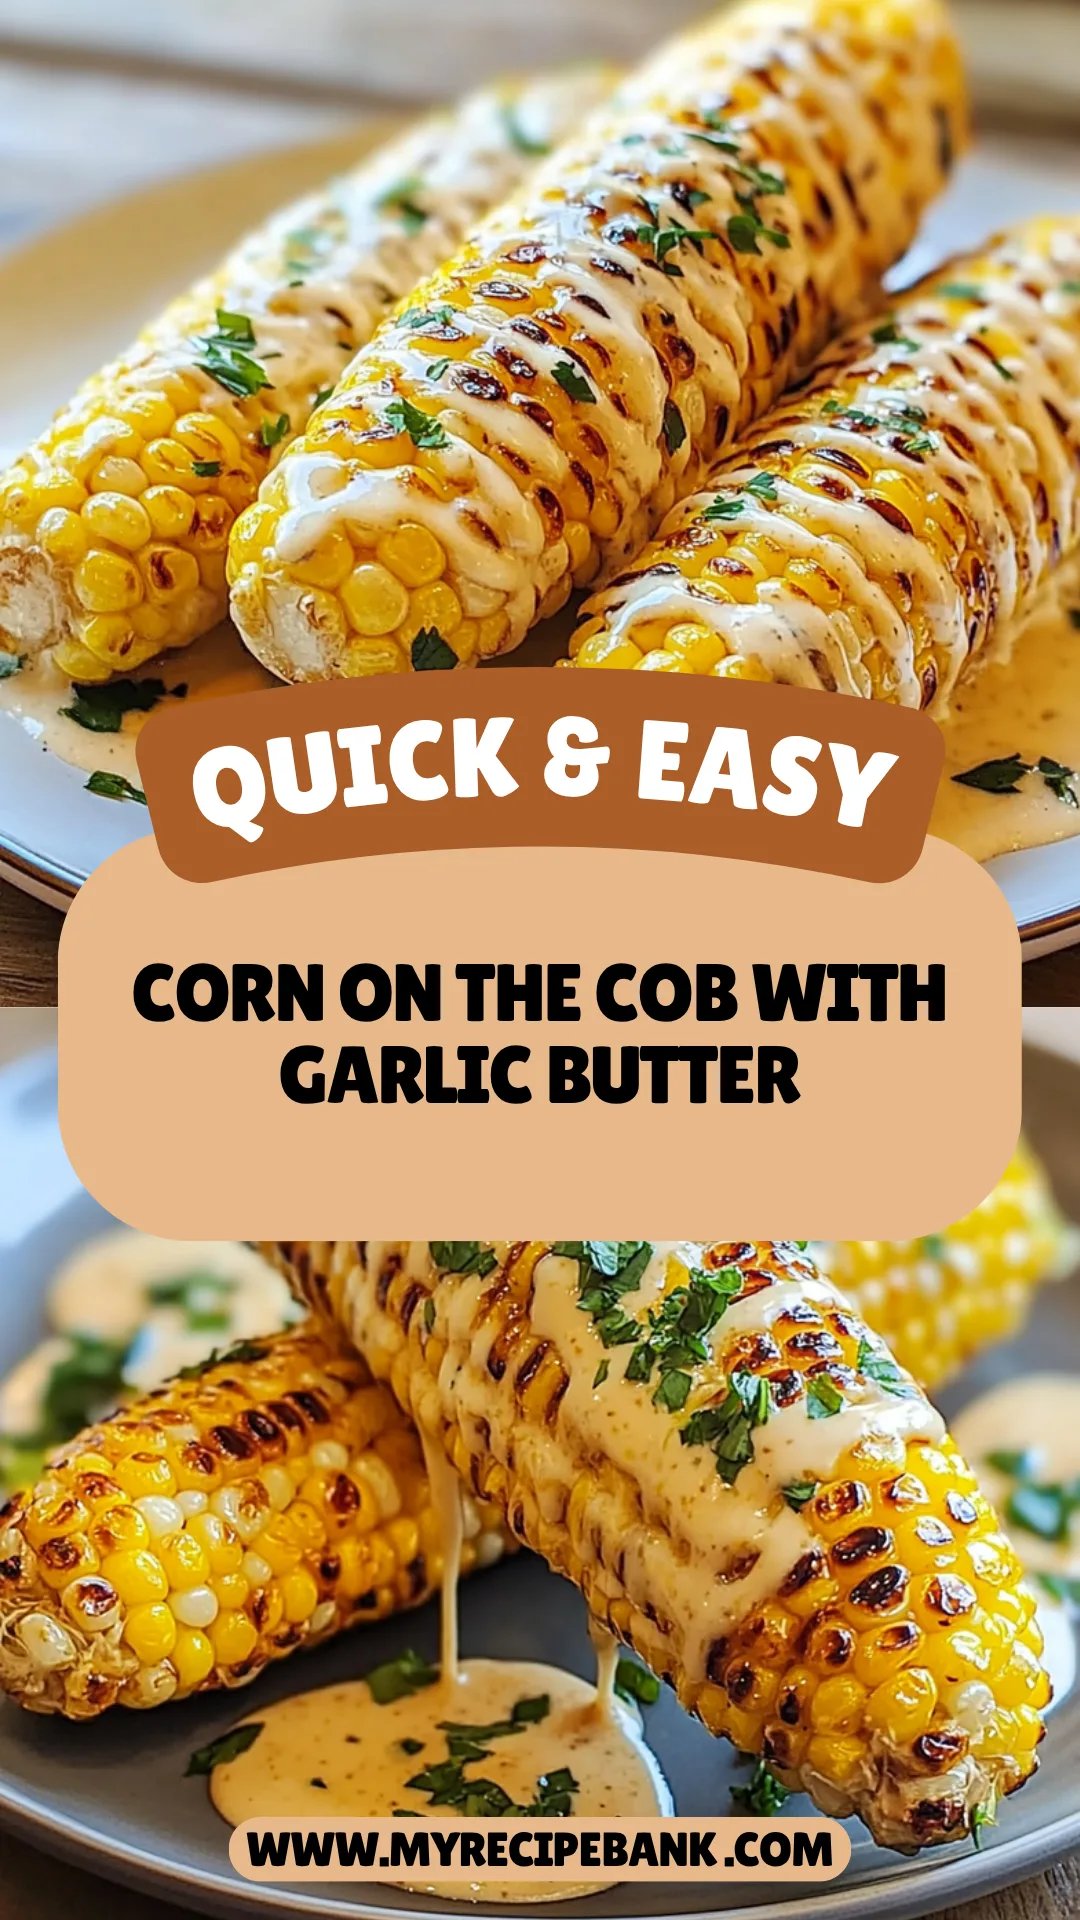
Imagine sinking your teeth into a perfectly grilled Corn on the Cob, where each bite bursts with sweet juiciness and that irresistible smoky flavor from the grill. The tantalizing aroma wafts through the air, making it impossible to resist this classic summer side dish that embodies everything delightful about barbecues and picnics.
Growing up, summer weekends meant family gatherings with laughter and stories shared over steaming platters of Corn on the Cob, slathered in butter and sprinkled with salt. There’s something magical about holding that golden ear in your hands, savoring each juicy kernel as it transports you back to those sun-soaked days filled with joy and connection.
Why Is Corn on the Cob So Irresistibly Good?
Freshness matters! There’s nothing like biting into sweet, juicy corn straight from the cob, bursting with flavor. Simplicity shines here; just four ingredients and 20 minutes yield a dish that’s both delicious and easy to prepare. Versatile as a side or snack, it pairs perfectly with barbecues and picnics. Crowd-pleaser alert: everyone loves the fun of eating corn on the cob! Lastly, butter and seasoning elevate its taste to another level, making every bite simply unforgettable.
Corn on the Cob Ingredients
- 4 ears Fresh Corn on the Cob (Husked and cleaned) – Choose the freshest corn for maximum sweetness; look for bright green husks and plump kernels.
- 4 tablespoons Unsalted Butter (Melted, for serving) – This rich butter adds a luscious touch; opt for unsalted to control seasoning.
- 1 teaspoon Salt (For seasoning) – Enhances the natural sweetness of the corn; adjust to taste based on preference.
- 1 teaspoon Black Pepper (For seasoning) – Adds a subtle kick that complements the sweetness of the Corn on the Cob perfectly.
How to Make Corn on the Cob
1. Fill a large pot with water and bring it to a boil. The bubbling water is crucial for cooking your 4 ears of fresh corn on the cob evenly and perfectly.
2. Add the husked corn to the boiling water and cook for 5-7 minutes until tender. You’ll know it’s ready when the kernels are bright yellow and plump, releasing that sweet aroma.
3. Remove the corn using tongs and let it cool slightly. This short rest will help you avoid burning your fingers while enjoying your delicious creation!
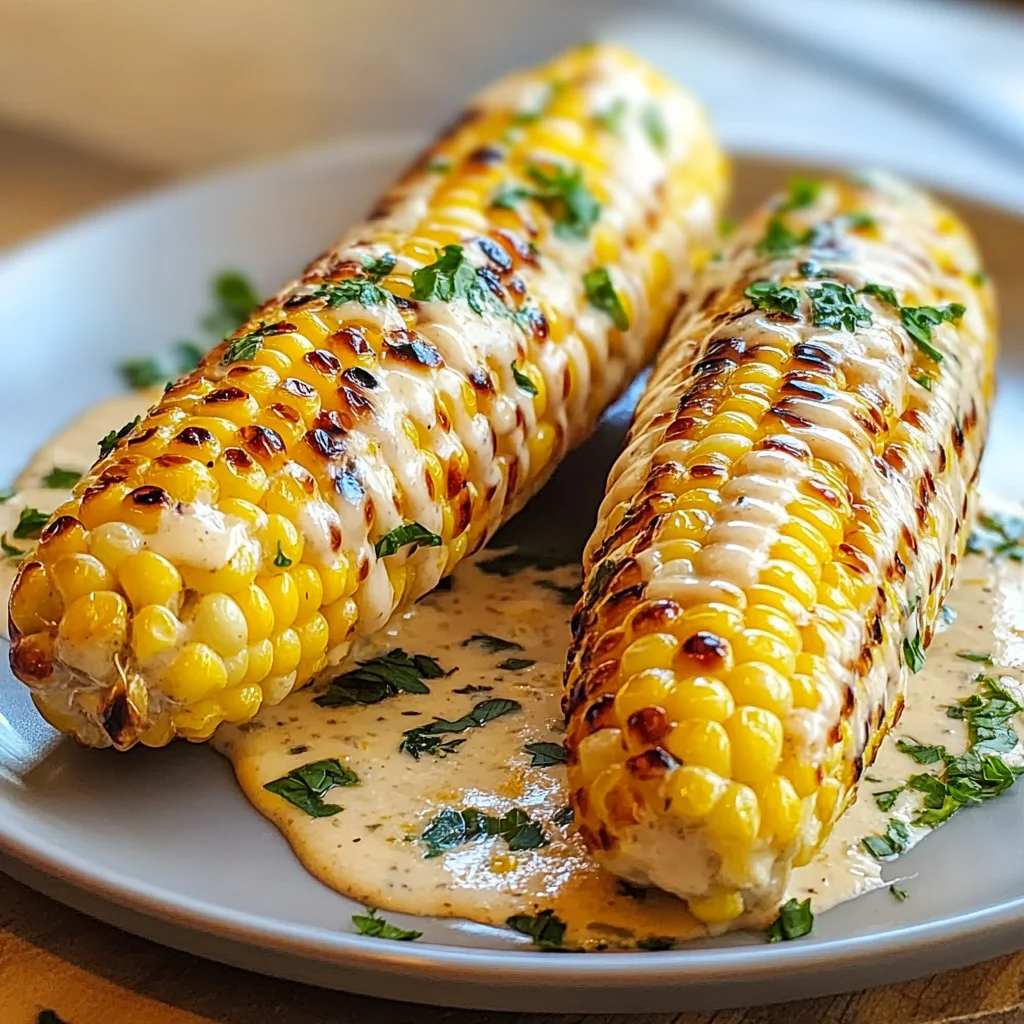
4. Serve with melted butter, salt, and pepper. Drizzle 4 tablespoons of unsalted butter over each ear, then sprinkle with 1 teaspoon of salt and 1 teaspoon of black pepper to enhance the flavors.
5. Preheat the grill to medium-high heat. Perfectly charred corn can elevate any summer gathering, so get that grill nice and hot!
6. Place the husked corn directly on the grill and cook for 10-15 minutes, turning occasionally until charred and tender. Look for beautiful grill marks and a slight caramelization on those sweet kernels.
7. Remove from the grill and let it cool slightly. Patience is key here; let that golden goodness rest before diving in!
8. Serve with melted butter, salt, and pepper. The combination of creamy butter, a sprinkle of salt, and black pepper will make each bite irresistible.
Optional: Try adding fresh herbs or chili powder for an extra kick!
Exact quantities are listed in the recipe card below.
Tips for the Best Corn on the Cob
- Choose Fresh Corn: Select ears with bright green husks and moist silk for maximum sweetness and flavor. Avoid dull or dried-out husks.
- Don’t Overcook: Boil corn for only 5-7 minutes to maintain its crispness. Overcooking can make it mushy and lose that delightful crunch.
- Grill with Care: For grilled corn, turn frequently to achieve even charring. This brings out those beautiful smoky flavors without burning the kernels.
- Season Generously: After serving, drizzle melted butter over the corn and sprinkle salt and pepper generously. This enhances the natural sweetness of the corn on the cob.
- Cool Before Serving: Let the corn cool slightly before serving to prevent burns. This also allows the flavors to settle in beautifully.
How to Store and Freeze Corn on the Cob
Room Temperature: Keep fresh corn on the cob at room temperature for up to 2 days, ideally in a cool, dark place away from direct sunlight.
Fridge: Store husked corn on the cob in an airtight container or wrapped in plastic wrap for up to 5 days. This helps retain its sweetness and moisture.
Freezer: For longer storage, freeze corn on the cob after blanching it for 4-5 minutes. Wrap each ear tightly in foil or freezer bags, and it can last up to 12 months.
Reheating: To enjoy leftover corn on the cob, steam or microwave it until heated through. Add melted butter, salt, and pepper for a delightful taste!
Corn on the Cob Variations
Feel free to get creative and tailor this classic dish to your taste preferences!
- Herbed Butter: Mix in fresh herbs like parsley or chives for a fragrant twist. The vibrant flavors brighten up each bite and add a fresh garden touch.
- Spicy Lime: Squeeze fresh lime juice and sprinkle chili powder over the corn for a zesty kick. This combination offers a delightful contrast of sweet and spicy that’s perfect for summer gatherings.
- Parmesan Topping: Grate fresh Parmesan cheese over the hot corn before serving. The salty, nutty flavor enhances the sweetness of the corn, creating a savory sensation that’s hard to resist.
- Coconut Cream: Swap melted butter for coconut cream for a tropical flair. This rich alternative brings a creamy texture and subtle sweetness that pairs beautifully with grilled meats.
- Smoky BBQ: Brush the corn with your favorite BBQ sauce before grilling. The smoky, tangy glaze caramelizes slightly, adding depth and complexity to each delicious bite.
- Garlic Infusion: Add minced garlic to melted butter for a fragrant finish. The aromatic garlic elevates the overall flavor profile, making every nibble irresistible.
- Sweet Maple Drizzle: Drizzle pure maple syrup over the corn after cooking for a sweet, caramelized flavor. It’s an unexpected yet delightful way to enhance the natural sweetness of the corn.
- Buffalo Style: Toss cooked corn in buffalo sauce for an exciting heat level. The spicy, buttery sauce transforms this side into a bold statement on your picnic table!
Make Ahead Options
Preparing Corn on the Cob ahead of time is a fantastic way to save precious moments during busy summer gatherings. You can husk and clean the corn up to 24 hours in advance, storing it in a sealed container in the refrigerator to maintain its freshness. When you’re ready to enjoy this classic side dish, simply fill a large pot with water and bring it to a boil, then add the prepared corn and cook for 5-7 minutes until tender. Alternatively, if you prefer the grilling method, you can pre-husk your corn and keep it wrapped in foil for up to 3 days before grilling. Just remember, whether boiling or grilling, serve with melted butter, salt, and pepper right before serving to ensure that each bite of your sweet, juicy Corn on the Cob is bursting with flavor!
Corn on the Cob Recipe FAQs
What type of corn is best for boiling or grilling?
For the sweetest and juiciest results, choose fresh, in-season corn on the cob. Look for ears with bright green husks, tightly packed kernels, and minimal blemishes. The kernels should be plump and milky when you press them lightly.
Can I store leftover corn on the cob?
Absolutely! If you have leftover corn on the cob, let it cool completely, then wrap it tightly in plastic wrap or aluminum foil. Store it in the refrigerator for up to 3 days. Reheat it by placing it back in boiling water for a couple of minutes or popping it in the microwave.
How do I freeze corn on the cob?
Freezing corn on the cob is simple! Husk and clean your corn, then blanch it in boiling water for 4 minutes to preserve its flavor and texture. After blanching, immediately place the cobs in ice water to stop cooking. Drain well, wrap individually in plastic wrap, and store in a freezer bag—good for up to 6 months!
What if my corn is tough after boiling or grilling?
If your corn turns out tough, it might not have been fresh or cooked long enough. Make sure to cook your corn for 5-7 minutes when boiling or until tender and charred (about 10-15 minutes) on the grill. If you’re using older corn, consider soaking it for 30 minutes before cooking; this can help soften it during cooking.
What are some dietary considerations when serving corn on the cob?
Corn is naturally gluten-free and a great source of fiber! However, if you’re watching your salt intake or following a specific diet like veganism, simply replace butter with olive oil or vegan butter alternatives. Keep seasonings light if you’re managing sodium levels.
How many servings does this recipe yield?
This recipe yields 4 servings, making it perfect as a side dish at barbecues or picnics. Each ear of corn provides about 123 calories when served with butter, salt, and pepper—perfectly indulgent without going overboard!
Corn on the Cob
Ingredients
Method
- Fill a large pot with water and bring it to a boil.
- Add the husked corn to the boiling water and cook for 5-7 minutes until tender.
- Remove the corn using tongs and let it cool slightly.
- Serve with melted butter, salt, and pepper.
- Preheat the grill to medium-high heat.
- Place the husked corn directly on the grill and cook for 10-15 minutes, turning occasionally, until charred and tender.
- Remove from the grill and let it cool slightly.
- Serve with melted butter, salt, and pepper.